Welcome, aspiring modders and Minecraft aficionados! If you’ve ever found yourself immersed in the blocky landscapes of Minecraft and thought, “Hey, wouldn’t it be cool if I could add my own twist to this world?”—you’re in the right place. Today, we’re diving headfirst into the captivating realm of Minecraft mods. 🎮
What is a Minecraft Mod?
A “mod” is short for modification. In the context of Minecraft, a mod is essentially a piece of software that alters or adds to the game’s code, thereby changing the gameplay, the environment, or your in-game interactions. Imagine being able to introduce new creatures, fantastical structures, or even entirely new dimensions to explore. With mods, the Minecraft universe is your oyster!
You can create your own mods to add your own customized touch to your Minecraft server and you can even share your created mods with other players.
What Can a Mod Do?
The possibilities are virtually endless. Here’s a quick rundown:
- New Items: Ever wanted a sword that shoots fireballs? Make it happen.
- Custom Creatures: Populate your world with mythical beasts or friendly NPCs.
- Game Mechanics: Introduce new gameplay elements like magic systems or industrial machinery.
- Environments: Create new biomes, dimensions, or even planets.
- Quality of Life: Add inventory management systems, mini-maps, or user interface enhancements.
To whet your appetite, here are some iconic mods that have enriched the Minecraft experience:
- Optifine: Enhances graphics and adds numerous visual customization options.
- JourneyMap: Provides a detailed map to help you navigate your world.
- Tinkers’ Construct: Allows you to custom-build tools and weapons with unique abilities.
- Thaumcraft: Introduces a full-fledged magic system, complete with spells, wands, and arcane research.
Feel free to check them out first and get inspired! Return to this page once you’re done and we’ll delve into how you can create your own mods, step-by-step.
Why Mod Minecraft?
- Creative Expression: Unleash your creativity by designing elements that reflect your imagination.
- Skill Development: Learn valuable coding and game design skills.
- Community Engagement: Share your mods and collaborate with a global community of like-minded individuals.
So, are you ready to roll up your sleeves and delve into the world of Minecraft modding? Trust me, it’s not just a game; it’s an art form, a science, and a community all rolled into one. Stay tuned as we guide you through the nuts and bolts of creating your very own Minecraft mod.

Setting Up Your Minecraft Environment
Before we can dive into the nitty-gritty of Minecraft modding, we need to set up a proper development environment. Don’t worry; we’ve got you covered every step of the way. Let’s get those gears turning! 🛠️
Prerequisites
Before we begin, make sure you have the following:
- Java Development Kit (JDK): Minecraft is built on Java, so you’ll need the JDK to write and compile your mods.
- Integrated Development Environment (IDE): We recommend IntelliJ IDEA or Eclipse for coding.
- Minecraft Account: You’ll need a copy of Minecraft to test your mods.
Just a quick note on the JDK version. When you install Minecraft to your computer, the installer automatically installs the correct Java version for you. However, the JDK is the development kit. We recommend downloading Oracle’s JDK 8, you can get it from their official website or you can download the OpenJDK here.
Step 1: Install the JDK
- Download: Head over to the official JDK website and download the version suitable for your operating system.
- Install: Run the installer and follow the on-screen instructions.
- Verify: Open a terminal and type
java -versionto ensure it’s installed correctly.
Step 2: Choose and Install an IDE
- IntelliJ IDEA: Known for its robust features and user-friendly interface.
- Eclipse: Another solid choice, especially if you’re already familiar with it.
Run the installer and follow the setup instructions.
Step 3: Install Minecraft Forge
Minecraft Forge is a modding API that makes it easier to create mods.
- Download: Visit the Forge website and download the installer.
- Install: Run the installer and select “Install client.”
- Verify: Open your Minecraft launcher and make sure the Forge profile is selected.
Step 4: Set Up Your Project
- Open IDE: Launch IntelliJ IDEA or Eclipse.
- New Project: Create a new Java project and specify the location of the JDK and Minecraft Forge.
- Project Structure: Set up your directories for source code, assets, and configurations.
Step 5: Hello, World!
Before we move on, let’s write a simple “Hello, World!” mod to make sure everything is working as it should.
package com.yourname.helloworld;

import net.minecraft.init.Blocks;
import net.minecraftforge.fml.common.Mod;

@Mod(modid = "helloworld", name = "Hello World", version = "1.0")
public class HelloWorld {
    public HelloWorld() {
        System.out.println("Hello, Minecraft World!");
    }
}
Compile and run your mod. If you see the message “Hello, Minecraft World!” in the console, congratulations! You’re all set for the exciting journey ahead.
Running Minecraft from Your IDE: A Quick Guide
Welcome back, modding enthusiasts! Before we dive deeper into the world of Minecraft modding, it’s crucial to know how to test your mods. This involves running Minecraft directly from your IDE. Don’t worry; it’s simpler than it sounds. Let’s get you up and running! 🚀
For IntelliJ IDEA Users
- Refresh Gradle Project: After setting up your modding project, look for the Gradle tab usually located on the right side of the IDE. Right-click on your project and choose “Refresh”.
- Run Configurations: Navigate to the “Run/Debug Configurations” dialog by clicking on the dropdown next to the Run and Debug icons at the top-right corner.
- Select Profile: Look for the “Forge” profile. This is automatically created when you set up your modding environment.
- Run: Click the green Run button, and IntelliJ IDEA will compile your code and launch Minecraft with your active mods.
For Eclipse Users
- Refresh Project: Right-click on your project in the Project Explorer and choose “Refresh” or simply press
F5. - Run Configurations: Navigate to
Run > Run Configurationsfrom the top menu. - Select Profile: In the left sidebar, expand the “Java Application” section and look for the “Forge” profile.
- Run: Click the “Run” button at the bottom of the dialog. Eclipse will compile your code and launch Minecraft with your mods.
Verifying Your Setup
Once Minecraft launches, go to the “Mods” menu from the main screen. You should see your mod listed among the active mods. If it’s there, congratulations! Your setup is correct, and you’re ready to test all the fantastic mods you’ll create.
The Core Concepts of Minecraft Modding
Now that you’ve set up your development environment, you’re probably itching to start creating. But before we unleash your creative genius, let’s get familiar with some core concepts that form the bedrock of Minecraft modding. Knowledge is power, after all! 📚
Game Loop
- What Is It?: The game loop is the heart of any video game. It’s a continuous cycle that updates all elements of the game—like rendering graphics and handling user input. A game loop runs top to bottom. If a game’s FPS is set to 60 frame per second, then the game loop will run 60 times per second.
- Why It Matters: Understanding the game loop helps you know when and how your mod’s code will be executed.
Events
- What Is It?: Events are specific occurrences or actions in the game, like a block being broken or a player joining the game.
- Why It Matters: By hooking into these events, you can make your mod respond to specific in-game actions.
Object-Oriented Programming (OOP)
- What Is It?: OOP is a programming paradigm that uses “objects” to organize code.
- Why It Matters: Minecraft is written in Java, which is an object-oriented language. Understanding OOP will help you structure your mod more effectively.
Minecraft Forge API
- What Is It?: It’s a set of code libraries and tools for modding Minecraft.
- Why It Matters: Forge provides the hooks and utilities to make modding easier, saving you from having to modify Minecraft’s source code directly.
Blocks, Items, and Entities
- What Are They?: These are the basic elements you’ll be working with. Blocks make up the terrain, items are objects you can hold, and entities encompass everything that moves, like mobs and players.
- Why They Matter: Knowing how these elements are coded and interact will be crucial when you start creating your own.
Data-Driven Design
- What Is It?: This approach allows you to define new game elements through data files, like JSON or XML, instead of hard-coding them.
- Why It Matters: It makes your mod easier to update and more compatible with other mods.
Version Control
- What Is It?: A system for tracking changes to your code, commonly using tools like Git.
- Why It Matters: As your mod grows, version control becomes essential for managing changes and collaborating with others.
Your First Minecraft Mod: Creating a Simple Block
The moment you’ve been waiting for has arrived. We’re about to create our very first Minecraft mod—a simple custom block. By the end of this section, you’ll have a new block in your Minecraft world that you can proudly say you created. Let’s get coding! 🛠️
Step 1: Create a New Package and Class
- Open Your IDE: Launch IntelliJ IDEA or Eclipse and open your modding project.
- New Package: Create a new package under
src/main/javaand name itcom.yourname.myfirstblock. - New Class: Inside this package, create a new Java class called
MyFirstBlock.
Step 2: Define Your Block
Open the MyFirstBlock class and paste the following code:
package com.yourname.myfirstblock;

import net.minecraft.block.Block;
import net.minecraft.block.material.Material;

public class MyFirstBlock extends Block {
    public MyFirstBlock() {
        super(Properties.create(Material.ROCK)
            .hardnessAndResistance(1.5f, 6.0f));
    }
}
Here, we extend Minecraft’s Block class and define our block’s material and properties.
Step 3: Register the Block
Create a new class in the same package and name it ModEventSubscriber. Paste the following code:
package com.yourname.myfirstblock;

import net.minecraft.block.Block;
import net.minecraft.block.Blocks;
import net.minecraftforge.event.RegistryEvent;
import net.minecraftforge.eventbus.api.SubscribeEvent;
import net.minecraftforge.fml.common.Mod;

@Mod.EventBusSubscriber(modid = "myfirstblock", bus = Mod.EventBusSubscriber.Bus.MOD)
public class ModEventSubscriber {
    @SubscribeEvent
    public static void onRegisterBlocks(RegistryEvent.Register<Block> event) {
        event.getRegistry().registerAll(
            new MyFirstBlock().setRegistryName("myfirstblock", "my_first_block")
        );
    }
}
This code registers your custom block so that Minecraft recognizes it.
Step 4: Add Texture and Name
- Texture: Place your block’s texture image in
src/main/resources/assets/myfirstblock/textures/block. - Localization: Add the block’s name by editing the
en_us.jsonfile insrc/main/resources/assets/myfirstblock/lang.
{
  "block.myfirstblock.my_first_block": "My First Block"
}
Step 5: Test Your Mod
- Compile: Build your project.
- Run: Launch Minecraft through your IDE, making sure to select the Forge profile.
- Verify: Open a world and check if your new block appears in the inventory.
And there you have it—a custom block, crafted by your own hands! This is just the tip of the iceberg; the possibilities are endless from here. In the next section, we’ll explore more advanced modding techniques.
Crafting Your First Item: A Custom Sword
Now that you’ve conquered the art of block creation, and now it’s time to forge ahead, literally. In this section, we’ll guide you through the process of creating your very own custom sword. Ready to become a Minecraft blacksmith? Let’s get started! 🗡️
Step 1: Create a New Package and Class
- Open Your IDE: If it’s not already open, launch IntelliJ IDEA or Eclipse and navigate to your modding project.
- New Package: Create a new package under
src/main/javaand name itcom.yourname.customsword. - New Class: Inside this package, create a new Java class called
CustomSword.
Step 2: Define Your Sword
Open the CustomSword class and paste the following code:
package com.yourname.customsword;

import net.minecraft.item.IItemTier;
import net.minecraft.item.SwordItem;

public class CustomSword extends SwordItem {
    public CustomSword(IItemTier tier, int attackDamage, float attackSpeed, Properties properties) {
        super(tier, attackDamage, attackSpeed, properties);
    }
}
Here, we’re extending Minecraft’s SwordItem class and passing in parameters to define our sword’s properties.
Step 3: Register the Item
In the same package, open your ModEventSubscriber class (or create one if you haven’t) and add the following code:
@SubscribeEvent
public static void onRegisterItems(RegistryEvent.Register<Item> event) {
    event.getRegistry().registerAll(
        new CustomSword(ItemTier.IRON, 6, -2.4F, new Item.Properties().group(ItemGroup.COMBAT))
            .setRegistryName("customsword", "my_custom_sword")
    );
}
This registers your custom sword so that Minecraft can recognize it.
Step 4: Add Texture and Name
- Texture: Place your sword’s texture image in
src/main/resources/assets/customsword/textures/item. - Localization: Add the sword’s name by editing the
en_us.jsonfile insrc/main/resources/assets/customsword/lang.
{
  "item.customsword.my_custom_sword": "My Custom Sword"
}
Step 5: Crafting Recipe
Create a new JSON file in src/main/resources/data/customsword/recipes and name it my_custom_sword.json. Add the following content:
{
  "type": "minecraft:crafting_shaped",
  "pattern": [
    " E ",
    " S ",
    " S "
  ],
  "key": {
    "E": {
      "item": "minecraft:emerald"
    },
    "S": {
      "item": "minecraft:stick"
    }
  },
  "result": {
    "item": "customsword:my_custom_sword"
  }
}
This defines a crafting recipe for your custom sword.
Step 6: Test Your Mod
- Compile: Build your project.
- Run: Launch Minecraft through your IDE, making sure to select the Forge profile.
- Verify: Open a world, gather the crafting materials, and see if you can craft your new sword.
Congratulations, you’ve just crafted your first custom item—a sword, no less! The world of Minecraft will never be the same. In the next section, we’ll delve into more advanced topics like creating custom creatures and game mechanics.
Bringing Life to Minecraft: Creating Your First Custom Creature
You’ve built blocks and forged swords, but now it’s time to breathe life into your Minecraft world. In this section, we’re going to create a custom creature—an entity that will roam your landscapes. Ready to play god? Let’s dive in! 🐾

Step 1: Create a New Package and Class
- Open Your IDE: Navigate to your modding project in IntelliJ IDEA or Eclipse.
- New Package: Create a new package under
src/main/javaand name itcom.yourname.customcreature. - New Class: Inside this package, create a new Java class called
CustomCreature.
Step 2: Define Your Creature
Open the CustomCreature class and paste the following code:
package com.yourname.customcreature;

import net.minecraft.entity.EntityType;
import net.minecraft.entity.passive.AnimalEntity;
import net.minecraft.world.World;

public class CustomCreature extends AnimalEntity {
    public CustomCreature(EntityType<? extends AnimalEntity> type, World worldIn) {
        super(type, worldIn);
    }
}
Here, we’re extending Minecraft’s AnimalEntity class, which provides a lot of the functionality we’ll need.
Step 3: Register the Entity
In your ModEventSubscriber class, add the following code to register your custom creature:
@SubscribeEvent
public static void onRegisterEntities(final RegistryEvent.Register<EntityType<?>> event) {
    event.getRegistry().register(
        EntityType.Builder.create(CustomCreature::new, EntityClassification.CREATURE)
            .size(1.0F, 1.0F)
            .build("customcreature")
            .setRegistryName("customcreature", "my_custom_creature")
    );
}
This code registers your custom creature so that Minecraft knows it exists.
Step 4: Add Texture and Name
- Texture: Place your creature’s texture image in
src/main/resources/assets/customcreature/textures/entity. - Localization: Add the creature’s name by editing the
en_us.jsonfile insrc/main/resources/assets/customcreature/lang.
{
  "entity.customcreature.my_custom_creature": "My Custom Creature"
}
Step 5: Spawn Behavior
To make your creature spawn naturally in the world, you’ll need to add some spawn rules. This usually involves specifying biomes and conditions under which your creature will appear.
Step 6: Test Your Mod
- Compile: Build your project.
- Run: Launch Minecraft through your IDE, selecting the Forge profile.
- Verify: Open a world and see if your custom creature spawns naturally or can be spawned using a spawn egg.
Voilà! You’ve just added a new life form to Minecraft! Whether it’s friend or foe, your custom creature is bound to add a new layer of excitement to the game.
Casting Spells in Minecraft: Creating a Simple Magic System
You’ve built, forged, and even brought life into your Minecraft world. Now, how about adding a sprinkle of magic? In this section, we’ll guide you through creating a simple magic system.
Ready to cast some spells? Let’s get magical! 🌟
Step 1: Create a New Package and Class
- Open Your IDE: Navigate to your modding project in IntelliJ IDEA or Eclipse.
- New Package: Create a new package under
src/main/javaand name itcom.yourname.simplemagic. - New Class: Inside this package, create a new Java class called
MagicSpell.
Step 2: Define Your Spell
Open the MagicSpell class and paste the following code:
package com.yourname.simplemagic;

import net.minecraft.entity.player.PlayerEntity;
import net.minecraft.world.World;

public class MagicSpell {
    public void castSpell(PlayerEntity player, World world) {
        // Spell logic here
    }
}
Here, we define a castSpell method that will contain the logic for our spell.
Step 3: Implement Spell Logic
Let’s make a simple spell that creates an explosion. Update the castSpell method as follows:
public void castSpell(PlayerEntity player, World world) {
    world.createExplosion(player, player.getPosX(), player.getPosY(), player.getPosZ(), 2.0F, false);
}
Step 4: Trigger the Spell
To cast the spell, we need a trigger. Let’s use a custom item for this. Update your CustomSword class or create a new item class, adding the following code:
@Override
public ActionResult<ItemStack> onItemRightClick(World world, PlayerEntity player, Hand hand) {
    new MagicSpell().castSpell(player, world);
    return new ActionResult<>(ActionResultType.SUCCESS, player.getHeldItem(hand));
}
This will cast the spell when the item is right-clicked.
Step 5: Test Your Mod
- Compile: Build your project.
- Run: Launch Minecraft through your IDE, making sure to select the Forge profile.
- Verify: Open a world, obtain your custom item, and right-click to cast the spell.
And there you have it—a simple magic system to add a touch of sorcery to your Minecraft world!
This is just the beginning; you can expand this system with more spells, wands, and even magical creatures. The magical world is your oyster! 🧙♂️
Next Steps and Additional Resources: Your Journey Has Just Begun
You’ve come a long way, crafting blocks, forging items, breathing life into creatures, and even dabbling in the arcane arts. But remember, this is just the beginning. The world of Minecraft modding is vast and ever-expanding. So, what’s next? 🌍
Advanced Modding Topics
- Multiplayer Support: Learn how to make your mods compatible with multiplayer servers.
- Custom Biomes and Dimensions: Create entirely new worlds for players to explore.
- User Interfaces: Add custom menus, HUD elements, and other interfaces.
- Networking: Understand how to send data between the client and server.
Community and Collaboration
- Forums and Discord: Join modding communities to share your creations and learn from others.
- Open Source: Consider open-sourcing your mod to collaborate with other developers.
- Modpacks: Learn how to bundle your mod with others to create a cohesive gameplay experience.
Recommended Tools and Libraries
- Git: Use version control to manage your project and collaborate with others.
- Maven or Gradle: Learn build automation tools to streamline your development process.
- Continuous Integration: Implement CI/CD pipelines for automated testing and deployment.
Books and Tutorials
- Minecraft Modding with Forge: A comprehensive guide to modding.
- Java Programming for Kids: Brush up on your Java skills.
- Advanced Java Optimization Techniques: Take your Java knowledge to the next level.
The Power of Java: Your Gateway to Advanced Programming
You’ve journeyed through the realms of Minecraft modding, but let’s not forget the magical incantations that made it all possible: Java. Mastering Java is not just about becoming a Minecraft modding guru; it’s your stepping stone to the broader world of software development. Let’s explore why. 🌟
Why Java Matters
- Versatility: From web servers to Android apps, Java’s versatility makes it one of the most widely-used languages in the world.
- Strong Community: A robust community means extensive libraries, frameworks, and a wealth of shared knowledge.
- Career Opportunities: Proficiency in Java can lead to various career paths, including backend development, big data, and even game development.
Deepening Your Java Skills
- Object-Oriented Principles: Master the core OOP concepts like inheritance, polymorphism, and encapsulation.
- Data Structures and Algorithms: Learn how to efficiently store and manipulate data.
- Design Patterns: Understand common design patterns to write more efficient and maintainable code.
- Concurrency: Dive into multi-threading and asynchronous programming to make your applications more robust and scalable.
Transitioning to Other Languages
- C# and Unity: If you’ve mastered Java, picking up C# for Unity game development will be a breeze.
- Python: The syntax may differ, but the programming principles you’ve learned will make learning Python easier.
- JavaScript: Move into web development by learning JavaScript, another C-style language with similar syntax but different use-cases.
Recommended Resources
- Effective Java: A book that goes beyond syntax to teach you how to write professional, robust Java code.
- Java: The Complete Reference: A comprehensive guide that covers everything from basics to advanced topics.
- Online Courses: Platforms like Coursera and Udemy offer in-depth Java courses, often with hands-on projects.
Your Journey Onwards
You’ve embarked on a journey that combines creativity, technical skill, and endless possibilities. Whether you’re modding for fun, education, or even a future career in game development, the skills you’ve acquired here are invaluable. So keep experimenting, keep learning, and most importantly, keep modding!
Thank you for joining us on this incredible journey. Until our next modding adventure, happy crafting! 🛠️
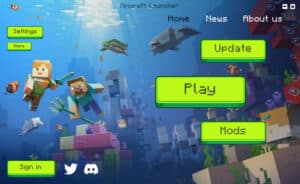
Don’t forget, once you have created your own mods and setup your own custom Minecraft server for people to play, you can develop your own Custom Minecraft Launcher with Game Launcher Creator V3!


