What's on this page?
Ever wanted to build your own Minecraft world where you and your friends can craft, explore, and battle mobs together? Well, you’re in the right place!
Setting up a Minecraft server might sound like rocket science, but trust me, it’s easier than you think. In this guide, we’ll walk through the steps to create your very own Minecraft server, even if you’re completely new to this. So, grab your pickaxe (and maybe a snack), and let’s dive into the blocky adventure of setting up your Minecraft server!
So long as you follow this guide step-by-step, you should be good to go.
 What is Java?
Java is a programming language and computing platform that allows you to run programs and games (like Minecraft) on your computer. Think of it as the behind-the-scenes magic that makes everything work.
Step 1: Check if Java is Installed
Let’s see if you already have Java on your system:

Preparing Your Computer
Before we embark on our block-building journey, let’s make sure your computer is all set to handle a Minecraft server. Don’t worry, I’ll walk you through every step!Check System Requirements
Running a Minecraft server can be a bit demanding on your computer, especially if you plan to have several players online simultaneously. Here’s what you’ll need: Minimum Requirements:- CPU: A modern dual-core processor.
- RAM: At least 4GB of RAM (8GB is better).
- Storage: Around 1GB of free space for the server files, plus extra for the world data.
- Internet Connection: A stable broadband connection.
- CPU: Quad-core processor or better.
- RAM: 8GB of RAM or more.
- Storage: Solid State Drive (SSD) for faster performance.
- Internet Connection: High-speed broadband for low latency.
- For Windows Users:
- Check CPU and RAM:
- Press
Windows Key + Pause/Breakto open System Properties. - Under the System section, you’ll see information about your processor and installed RAM.
- Press
- Check Storage:
- Open
File Explorerand click onThis PC. - You’ll see your drives listed with their available space.
- Open
- Check CPU and RAM:
- For macOS Users:
- Click on the Apple icon in the top-left corner and select About This Mac.
- A window will display your Mac’s specifications, including processor, memory, and storage.
Install Java
Minecraft servers run on Java, so we’ll need to make sure you have the correct version installed. What is Java?
Java is a programming language and computing platform that allows you to run programs and games (like Minecraft) on your computer. Think of it as the behind-the-scenes magic that makes everything work.
Step 1: Check if Java is Installed
Let’s see if you already have Java on your system:
- For Windows Users:
- Open Command Prompt:
- Press
Windows Key + R, typecmd, and press Enter.
- Press
- Check Java Version:
- Type
java -versionand press Enter. - If Java is installed, you’ll see a version number. If not, you’ll get an error message.
- Type
- Open Command Prompt:
- For macOS Users:
- Open Terminal:
- Go to
Applications>Utilities>Terminal.
- Go to
- Check Java Version:
- Type
java -versionand press Enter. - Similar to Windows, you’ll see a version number if Java is installed.
- Type
- Open Terminal:
- Download Java Development Kit (JDK) 17:
- Go to the Official Java Website:
- Visit the Oracle JDK Download Page.
- Note: You might need to create a free Oracle account to download the JDK.
- Go to the Official Java Website:
- Alternative Download (No Account Required):
- Use OpenJDK:
- Visit the Adoptium OpenJDK 17 Page.
- Download the installer suitable for your operating system.
- Use OpenJDK:
- For Windows Users:
- Run the Installer:
- Double-click the downloaded
.exefile.
- Double-click the downloaded
- Follow the Prompts:
- Click
Nextthrough the installation wizard. - You can use the default settings unless you have a specific reason to change them.
- Click
- Complete Installation:
- Click
Closewhen the installation is finished.
- Click
- Run the Installer:
- For macOS Users:
- Open the Installer:
- Double-click the downloaded
.dmgfile.
- Double-click the downloaded
- Install Java:
- Double-click the
.pkgfile inside the.dmg. - Follow the on-screen instructions.
- Double-click the
- Finish Up:
- Once the installation is complete, you can eject the installer.
- Open the Installer:
- Repeat the Java Version Check:
- Open Command Prompt (Windows) or Terminal (macOS).
- Type
java -versionand press Enter. - You should see something like
java version "17.x.x".
- Locate Your Java Installation Path:
- Default path is usually
C:\Program Files\Java\jdk-17.x.x.
- Default path is usually
- Set JAVA_HOME Variable:
- Open System Properties:
- Right-click on
This PCorMy Computerand selectProperties. - Click on
Advanced system settings.
- Right-click on
- Environment Variables:
- Click the
Environment Variablesbutton.
- Click the
- Create JAVA_HOME:
- Under
System variables, clickNew. - For
Variable name, enterJAVA_HOME. - For
Variable value, enter your Java installation path (e.g.,C:\Program Files\Java\jdk-17.x.x). - Click
OK.
- Under
- Open System Properties:
- Update the PATH Variable:
- In the
Environment Variableswindow, find thePathvariable underSystem variablesand clickEdit. - Click
Newand add%JAVA_HOME%\bin. - Click
OKto close all windows.
- In the
- Test the Configuration:
- Open a new Command Prompt window.
- Type
java -versionto confirm that Windows recognizes Java.
- Set JAVA_HOME in Terminal:
- Open Terminal.
- Type
export JAVA_HOME=/Library/Java/JavaVirtualMachines/jdk-17.jdk/Contents/Homeand press Enter. - This sets your
JAVA_HOMEfor the current session.
Setting Up the Minecraft Server
Now that your computer is ready, let’s get your Minecraft server up and running. This is where the real adventure begins!Download the Minecraft Server File
First, we’ll need to get the official Minecraft server software. Step 1: Visit the Official Minecraft Website- Open Your Web Browser:
- Launch your preferred web browser (Chrome, Firefox, Safari, etc.).
- Navigate to the Server Download Page:
- Go to the official Minecraft server download page.
- Locate the Server File:
- You’ll see a section titled “Minecraft Java Edition Server”.
- Download the Server File:
- Click on the link that says “minecraft_server.<version>.jar” (e.g.,
minecraft_server.1.20.1.jar). - Save the file to a location you can easily access, like your Downloads folder.
- Click on the link that says “minecraft_server.<version>.jar” (e.g.,

Create a Dedicated Folder
To keep things organized, we’ll create a specific folder for your server files. Step 1: Choose a Location- Decide where you want your server folder to be. Common choices are the Desktop or Documents folder.
- For Windows Users:
- Right-click in your chosen location.
- Select “New” and then “Folder”.
- Name the folder “Minecraft Server”.
- For macOS Users:
- Right-click (or Control-click) in your chosen location.
- Select “New Folder”.
- Name it “Minecraft Server”.
- Drag and drop the
minecraft_server.<version>.jarfile from your Downloads folder into the “Minecraft Server” folder you just created.
Run the Server for the First Time
It’s time to fire up your server for the first time to generate the necessary configuration files. Step 1: Open Command Prompt or Terminal- For Windows Users:
- Navigate to Your Server Folder:
- Open File Explorer and go to your “Minecraft Server” folder.
- Open Command Prompt in the Folder:
- Click on the address bar in File Explorer, type
cmd, and press Enter. - A Command Prompt window will open in your server folder.
- Click on the address bar in File Explorer, type
- Navigate to Your Server Folder:
- For macOS Users:
- Open Terminal:
- Go to Applications > Utilities > Terminal.
- Navigate to Your Server Folder:
- In Terminal, type
cdfollowed by a space. - Drag your “Minecraft Server” folder into the Terminal window to autofill the path.
- Press Enter.
- In Terminal, type
- Open Terminal:
- Enter the Command:
java -Xmx1024M -Xms1024M -jar minecraft_server.<version>.jar noguiReplace
<version> with the actual version number of your server file.
- Example:
java -Xmx1024M -Xms1024M -jar minecraft_server.1.20.1.jar nogui
-
- What This Does:
java: Runs the Java application.-Xmx1024M: Sets the maximum RAM usage to 1GB.-Xms1024M: Sets the starting RAM allocation to 1GB.-jar: Specifies that we’re running a Java Archive file.nogui: Runs the Minecraft server without the graphical user interface to save resources (We don’t need a GUI drawn).
- What This Does:
- Server Stops Automatically:
- The server will start and then stop, creating some files in the process.
- Locate
eula.txt:- In your “Minecraft Server” folder, find the file named
eula.txt.
- In your “Minecraft Server” folder, find the file named
- Edit
eula.txt:- Open the file with a text editor (Notepad on Windows, TextEdit on macOS).
- Change
eula=falsetoeula=true. - Why?
- This indicates that you agree to Mojang’s End User License Agreement.
- Save and Close:
- Save the changes and exit the text editor.
- Repeat the Command:
java -Xmx1024M -Xms1024M -jar minecraft_server.<version>.jar nogui
- Wait for the Server to Start:
- You’ll see messages as the server prepares the world and resources.
- When you see
Donein the command line, your server is up and running!
- New Files and Folders:
- The server will generate several files and folders:
server.properties: Configuration file for your server settings.logs: Folder containing server logs.world: Folder containing your Minecraft world data.
- The server will generate several files and folders:
- Do Not Delete These Files:
- They’re essential for your server to run properly.
- For Windows Users:
- Create a New Text Document:
- In your server folder, right-click and select “New” > “Text Document”.
- Name it “start.bat” (ensure it ends with
.batand not.txt).
- Edit the File:
- Right-click “start.bat” and select “Edit”.
- Paste the following command:
java -Xmx1024M -Xms1024M -jar minecraft_server.<version>.jar nogui
pause
- The
pausecommand keeps the window open if there’s an error.
- Save and Close:
- Save the file and exit Notepad.
- Run the Script:
- Double-click “start.bat” to start your server.
- Create a New Text Document:
- For macOS Users:
- Create a New Script File:
- Open TextEdit and select “Format” > “Make Plain Text”.
- Write the Script:
- Paste the following:
#!/bin/bash
java -Xmx1024M -Xms1024M -jar minecraft_server.<version>.jar nogui
- Paste the following:
- Save the File:
- Save it as “start.command” in your server folder.
- Make the Script Executable:
- Open Terminal and navigate to your server folder:
cd /path/to/your/server/folder
- Run the command:
chmod +x start.command
- Open Terminal and navigate to your server folder:
- Run the Script:
- Double-click “start.command” to launch your server.
- Create a New Script File:
- Don’t Close the Command Window:
- The server will stop if you close the Command Prompt or Terminal window.
- Stopping the Server Safely:
- In the command window, type
stopand press Enter. - This ensures the server shuts down properly, saving all data.
- In the command window, type
- “Java Not Recognized” Error:
- If you get an error saying
'java' is not recognized as an internal or external command, you may need to add Java to your system’s PATH variable. - For Windows Users:
- Revisit the Set Environment Variables section in Step 1.
- If you get an error saying
- Insufficient Memory Errors:
- If your server crashes due to memory issues, consider increasing the
-Xmxand-Xmsvalues to allocate more RAM (e.g.,-Xmx2Gfor 2GB).
- If your server crashes due to memory issues, consider increasing the
Configuring Your Minecraft Server
Fantastic! Your server is up and running, but now it’s time to make it truly yours. In this step, we’ll adjust the server settings to customize your Minecraft experience and ensure that your friends can join you in your blocky adventures.Tweak Server Settings
Theserver.properties file is your control center for all server configurations. By tweaking these settings, you can change game modes, set difficulty levels, and more.
Step 1: Locate the server.properties File
- Navigate to your “Minecraft Server” folder.
- Find the file named
server.properties. - Open it with a text editor:
- Windows: Right-click and select “Open with > Notepad”.
- macOS: Control-click and choose “Open with > TextEdit”.
motd(Message of the Day):- What It Does: Sets the custom message that appears in the server list.
- Example:
motd=Welcome to My Awesome Minecraft Server!
max-players:- What It Does: Defines the maximum number of players who can join your server.
- Default:
20 - Example:
max-players=10
difficulty:- What It Does: Sets the game difficulty.
- Options:
peaceful,easy,normal,hard - Example:
difficulty=easy
gamemode:- What It Does: Sets the default game mode for players when they join.
- Options:
survival,creative,adventure,spectator - Example:
gamemode=survival
pvp:- What It Does: Enables or disables Player vs. Player combat.
- Options:
true(enabled),false(disabled) - Example:
pvp=false
allow-nether:- What It Does: Allows players to enter the Nether dimension.
- Options:
true,false - Example:
allow-nether=true
spawn-monstersandspawn-animals:- What They Do: Control whether monsters and animals spawn in the game.
- Options:
true,false - Examples:
spawn-monsters=truespawn-animals=true
online-mode:- What It Does: Checks connecting players against Minecraft’s authentication servers.
- Options:
true(recommended),false - Important: Keep this set to
trueto ensure only players with valid Minecraft accounts can join. Setting it tofalsecan expose your server to security risks.
white-list:- What It Does: Enables a whitelist to control who can join your server.
- Options:
true,false - Example:
white-list=false - Note: If set to
true, you’ll need to specify which players are allowed to join.
- Edit Carefully:
- Change the values after the
=sign. - Avoid adding extra spaces or special characters.
- Change the values after the
- Example Modification:
motd=Welcome to My Awesome Minecraft Server!
max-players=5
difficulty=hard
gamemode=creative
pvp=false
- Save the File:
- Click “File” > “Save” or press
Ctrl+S(Windows) orCommand+S(macOS).
- Click “File” > “Save” or press
- Close the Text Editor:
- You’re done editing!
- Stop the Server:
- In the server command window, type
stopand press Enter.
- In the server command window, type
- Start the Server Again:
- Use your startup script (
start.batorstart.command) or the command line to restart the server.
- Use your startup script (
- Verify Changes:
- When the server restarts, it should load your new settings.
server.properties file, the server might not start. Double-check your edits if you encounter issues.
Set Up Port Forwarding
If you want friends outside your local network to join your server, you’ll need to set up port forwarding on your router. This allows external connections to reach your server. Understanding Port Forwarding- What Is It?
- Port forwarding directs traffic from the internet to a specific device on your local network.
- Why Do You Need It?
- By default, your router blocks unsolicited incoming connections for security. Port forwarding opens a specific door for your Minecraft server.
- Windows:
- Open Command Prompt:
- Press
Windows Key + R, typecmd, and press Enter.
- Press
- Type
ipconfigand Press Enter:- Look for
IPv4 Addressunder your active network adapter. - It will look something like
192.168.1.100.
- Look for
- Open Command Prompt:
- macOS:
- Open Terminal:
- Go to Applications > Utilities > Terminal.
- Type
ifconfig | grep inetand Press Enter:- Find the
inetvalue associated withen0or your active network interface. - It will look like
192.168.1.100.
- Find the
- Open Terminal:
- Open a Web Browser:
- Enter your router’s IP address into the address bar.
- Common router IPs are
192.168.1.1or192.168.0.1.
- Login:
- Enter your router’s username and password.
- If you haven’t changed these, they might be on a sticker on your router or in the manual.
- Find the Right Section:
- Look for sections labelled “Port Forwarding”, “Applications”, “Gaming”, or “Virtual Servers”.
- Add a New Rule:
- Click on “Add”, “Create”, or “New” to set up a rule.
- Enter the Details:
- Service Name:
Minecraft Server(or any name you prefer) - Port Range or External Port:
25565to25565 - Internal Port:
25565(if required) - Protocol:
TCPorTCP/UDP(if available) - Device IP or Internal IP Address: Enter your computer’s local IP address from Step 1
- Enabled: Check or toggle to enable the rule
- Service Name:
- Example Entry:
Setting Value Service Name Minecraft Server External Port 25565 Internal Port 25565 Protocol TCP/UDP Internal IP 192.168.1.100 Enabled Yes
- Save Settings:
- Click “Save”, “Apply”, or “OK”.
- Restart Router (if necessary):
- Some routers require a restart for changes to take effect.
- Windows Firewall:
- Open Windows Defender Firewall:
- Press
Windows Key, typeWindows Defender Firewall, and select it.
- Press
- Allow an App Through Firewall:
- Click “Allow an app or feature through Windows Defender Firewall”.
- Add Java Platform SE Binary:
- Ensure “Java(TM) Platform SE binary” is checked for both Private and Public networks.
- If it’s not listed, click “Allow another app…”, find the Java executable, and add it.
- Open Windows Defender Firewall:
- macOS Firewall:
- Open Security & Privacy Settings:
- Go to System Preferences > Security & Privacy > Firewall.
- Unlock Settings:
- Click the lock icon and enter your admin password.
- Add Java:
- Click “Firewall Options…”, then the “+” button to add “Java”.
- Set it to “Allow incoming connections”.
- Open Security & Privacy Settings:
- What Is It?
- Your public IP address is what others will use to connect to your server.
- How to Find It:
- Visit WhatIsMyIP.com or simply type “What is my IP” into Google.
- Share With Friends:
- Give your friends your public IP address so they can connect.
- Why Use It?
- If your public IP address changes frequently, a Dynamic DNS (DNS) service can help.
- How It Works:
- It maps a fixed domain name to your changing IP address.
- Popular Services:
- From an External Network:
- Ask a friend to try connecting using your public IP address.
- Troubleshoot if Necessary:
- If they can’t connect, double-check your port forwarding settings and firewall configurations.
Customize Your World (Optional)
Want to spice things up? You can customize your world settings or even load a pre-built world. Option 1: Change World Settings- Modify
server.properties:level-name: Sets the name of your world folder.- Example:
level-name=MyMinecraftWorld
- Example:
level-type: Defines the world type.- Options:
DEFAULT,FLAT,LARGEBIOMES,AMPLIFIED - Example:
level-type=FLAT
- Options:
- Download a Map:
- Find a Minecraft map you like from a reputable site.
- Replace the
worldFolder:- Delete or rename your existing
worldfolder. - Place the downloaded map folder into your server directory and name it
world.
- Delete or rename your existing
- Restart the Server:
- Start your server to load the new map.
- What Are Data Packs?
- They modify or add new advancements, functions, loot tables, and more without the need for mods.
- How to Install:
- Download a Data Pack:
- Ensure it’s compatible with your Minecraft version.
- Place It in the
datapacksFolder:- Navigate to
world/datapacks/and put the data pack zip file there.
- Navigate to
- Reload Data Packs:
- In the server command window, type
reloadand press Enter.
- In the server command window, type
- Download a Data Pack:
Set Up Operator Permissions
As the server owner, you might want to grant yourself and trusted players special permissions. Step 1: Understand Operator Levels- Levels Range from 1 to 4:
- 1: Can bypass spawn protection.
- 2: Includes level 1 permissions plus the ability to use
/clear,/effect,/gamemode, etc. - 3: Includes level 2 permissions plus
/ban,/op,/deop, etc. - 4: Includes all commands and permissions.
- In the Server Command Window:
op YourMinecraftUsername
- Example:
op John
- Edit
ops.json:- Open
ops.jsonin your server folder. - Modify the
"level"value for each operator.
- Open
- Example Entry:
[
  {
    "uuid": "player-uuid",
    "name": "Steve123",
    "level": 4,
    "bypassesPlayerLimit": false
  }
]
- Save the File:
- Ensure the JSON format is correct.
- Reload Operators:
- In the server command window, type
reloadand press Enter.
- In the server command window, type
Connecting to Your Server
Congratulations! Your server is set up and configured. Now it’s time to jump into your custom world and invite your friends to join the fun. In this step, we’ll walk through how to connect to your Minecraft server and share it with others.Launch Minecraft and Add Your Server
Step 1: Open Minecraft Java Edition- Launch the Game:
- Double-click the Minecraft Launcher icon on your desktop or find it in your applications folder.
- Log In:
- Enter your Minecraft account credentials if prompted.
- Ensure Correct Version:
- Make sure you’re running the same version of Minecraft as your server. You can select the game version in the launcher by clicking on “Installations” and creating a new profile if needed.
- From the Main Menu:
- Click on “Multiplayer”.
- Proceed Past Warnings (If Any):
- If you see a warning about online play, click “Proceed” or “Yes”.
- Click “Add Server”:
- This button is at the bottom of the multiplayer screen.
- Enter Server Details:
- Server Name:
- This is a nickname for your server. It can be anything you like.
- Example:
My Awesome Minecraft Server
- Server Address:
- If You’re Playing on the Same Computer as the Server:
- Enter
localhost.
- Enter
- If You’re on the Same Local Network:
- Enter the server computer’s local IP address (e.g.,
192.168.1.100).
- Enter the server computer’s local IP address (e.g.,
- If You’re Connecting Over the Internet:
- Enter your public IP address (e.g.,
123.45.67.89). - Note: Ensure port forwarding is set up (from Step 3) if connecting over the internet.
- Enter your public IP address (e.g.,
- If You’re Playing on the Same Computer as the Server:
- Server Name:
- Adjust Server Resource Pack Settings (Optional):
- Server Resource Packs:
- Choose whether to allow the server to send you resource packs.
- Options are
Prompt,Enabled, orDisabled.
- Server Resource Packs:
- Save the Server:
- Click “Done” to add the server to your list.
- Select Your Server:
- It should now appear in your multiplayer server list.
- Join the Server:
- Click on your server and then click “Join Server”.
- Wait for Connection:
- The game will load, and you should spawn into your Minecraft world.
- “Can’t Connect to Server” Error:
- Check the Server Status:
- Make sure your server is running. The command prompt or terminal window should be open and not showing any errors.
- Verify the IP Address:
- Double-check that you’ve entered the correct IP address.
- Firewall Settings:
- Ensure your firewall isn’t blocking Minecraft.
- Check the Server Status:
- Version Mismatch:
- Update Your Game:
- Ensure your Minecraft client version matches the server version.
- Update Your Game:
- Latency or Lag Issues:
- Optimize Settings:
- Lower your in-game video settings to improve performance.
- Optimize Settings:
Invite Friends to Join
Now that you’re connected, it’s time to bring your friends into the game! Option 1: Friends on the Same Local Network (LAN)- Share Your Local IP Address:
- Provide your local IP address to your friends (e.g.,
192.168.1.100).
- Provide your local IP address to your friends (e.g.,
- Friends Follow Similar Steps:
- They should open Minecraft, navigate to “Multiplayer”, and click “Add Server”.
- Enter a server name and your local IP address in the “Server Address” field.
- Click “Done”, select the server from the list, and click “Join Server”.
- Ensure Port Forwarding Is Set Up:
- Confirm that you’ve correctly configured port forwarding on your router (see Step 3).
- Share Your Public IP Address:
- Give your public IP address to your friends.
- Safety Note: Only share your public IP with people you trust.
- Friends Connect to Your Server:
- They add a new server in their Minecraft “Multiplayer” menu using your public IP address.
- The steps are the same: “Add Server” > Enter server name and address > “Done” > “Join Server”.
- Set Up a Dynamic DNS (DNS) Service:
- If you prefer not to share your IP address, use a service like No-IP or DynDNS.
- Create a Hostname:
- Sign up for an account and create a custom hostname (e.g.,
myminecraftserver.ddns.net).
- Sign up for an account and create a custom hostname (e.g.,
- Configure Your Router:
- Some routers support Dynamic DNS services; enter your account details in the router settings.
- Friends Connect Using Hostname:
- They use the hostname instead of the IP address in the “Server Address” field.
- Provide Clear Instructions:
- Make sure your friends know how to connect.
- Share Any Server Rules:
- If you have specific guidelines or mods installed, let them know.
- Connection Timeouts:
- Check Server Status:
- Ensure your server is running smoothly.
- Re-Verify IP Address or Hostname:
- Confirm that they are using the correct connection information.
- Check Server Status:
- “Server Not Found” Errors:
- Double-Check Spelling:
- Typos in the server address can cause issues.
- Firewall and Antivirus:
- They should ensure their firewall isn’t blocking Minecraft.
- Double-Check Spelling:
- Explore Together:
- Start building, mining, or adventuring as a team.
- Voice Communication (Optional):
- Use services like Discord or Skype to chat while playing.
- Open Chat Window:
- Press
Tor/to open the chat.
- Press
- Enter Commands:
- Start commands with a
/.
- Start commands with a
- Common Commands:
- Change Game Mode:
/gamemode survival [player]/gamemode creative [player]
- Teleport Players:
/tp [target player] [destination player]
- Set Time or Weather:
/time set day/weather clear
- Change Game Mode:
- Give Items:
/give [player] [item] [quantity]- Example:
/give Alex diamond 64
- Regular Backups:
- Periodically copy your
worldfolder to a safe location.
- Periodically copy your
- Monitoring Performance:
- Keep an eye on server messages for any errors or warnings.
- Updating the Server:
- When a new Minecraft version is released, download the latest server
.jarfile and replace the old one. - Remember to update your client game version accordingly.
- When a new Minecraft version is released, download the latest server
- Install Plugins:
- Use server software like Spigot or Paper to support plugins.
- Explore Mods:
- Mods can add new content but require all players to have them installed.
- Protect Your Server:
- Regularly change your router password and keep your computer secure.
- Set Boundaries:
- Consider setting up a whitelist or using
/banand/kickcommands if needed.
- Consider setting up a whitelist or using
- Be Inclusive:
- Create a welcoming environment for all players.
Growing and Enhancing Your Minecraft Server
Congratulations on setting up your own Minecraft server! Now that you’ve got your server running and friends are joining in on the fun, you might be wondering how to expand your community and make your server stand out. In this final section, we’ll explore ways to promote your server and introduce an exciting tool called Game Launcher Creator V3 that allows you to create a custom Minecraft launcher for your server.Promoting Your Minecraft Server
Building a vibrant community around your Minecraft server can enhance the gaming experience for everyone involved. Here are some effective ways to promote your server and attract more players: 1. Set Up a Discord Server- Create a Community Hub:
- Discord is a free platform that allows you to create a server where players can chat, share ideas, and stay updated.
- How to Get Started:
- Visit Discord and create an account if you haven’t already.
- Click on the “+” icon on the left sidebar to create a new server.
- Customize your server with channels for announcements, general chat, support, and voice channels.
- Invite Players:
- Share the Discord invite link with your friends and new players.
- Benefits:
- Real-time communication enhances coordination during gameplay.
- Builds a sense of community and keeps players engaged even when they’re not in-game.
- Facebook Groups and Pages:
- Create a Facebook page for your server to post updates, screenshots, and events.
- Join Minecraft-related groups and share your server details (ensure you follow group rules regarding promotions).
- Twitter:
- Set up a Twitter account for quick updates and interact with the Minecraft community using relevant hashtags like
#MinecraftServerand#MinecraftCommunity.
- Set up a Twitter account for quick updates and interact with the Minecraft community using relevant hashtags like
- Instagram:
- Share visually appealing screenshots and short video clips of your server builds and activities.
- Reddit:
- Participate in subreddits like r/Minecraft or r/MinecraftBuddies to share your server and find new players.
- Server Listing Sites:
- Websites like Minecraft Server List, Planet Minecraft, and Minecraft-mp.com allow you to list your server for free.
- Create an Engaging Description:
- Highlight unique features, game modes, and what makes your server special.
- Add Visuals:
- Include screenshots or banners to attract attention.
- Encourage Votes and Reviews:
- Ask your players to vote for your server to improve its ranking on these sites.
- Organize In-Game Events:
- Host building contests, treasure hunts, or PvP tournaments.
- Offer Rewards:
- Provide in-game rewards or special roles on your Discord server for winners.
- Promote Events:
- Advertise these events on your social media platforms and server listings to attract new players.
- Partner with Other Small Servers:
- Cross-promote each other’s servers to expand your reach.
- Engage with Streamers:
- Invite Twitch or YouTube gamers to play on your server.
- Offer them a unique experience or early access to new features.
- Establish an Online Presence:
- Use platforms like WordPress or Wix to create a simple website.
- Share Updates and Guides:
- Post server news, updates, and Minecraft tutorials.
- SEO Optimization:
- Use keywords relevant to your server to improve search engine visibility.
- Enforce Rules Fairly:
- Ensure all players feel safe and welcome.
- Active Moderation:
- Appoint trustworthy moderators to help manage the community.
- Gather Feedback:
- Regularly ask for player input to improve the server.
Create a Custom Minecraft Launcher with Game Launcher Creator V3
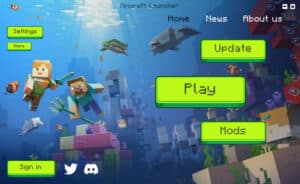
Want to take your server to the next level? Game Launcher Creator V3 offers a powerful way to enhance your players’ experience by creating a custom Minecraft launcher. This tool allows you to design a personalized launcher that can directly connect users to your server, provide updates, and offer a seamless start to their gaming session. What is Game Launcher Creator V3?- User-Friendly Launcher Development:
- An intuitive software that enables you to create custom game launchers without any programming knowledge.
- Drag-and-Drop Interface:
- Design your launcher using a simple drag-and-drop editor.
- Fully Customizable:
- Personalize every aspect of the launcher, including buttons, backgrounds, and functionality.
- Simplify the Connection Process:
- Configure the launcher to automatically connect players to your Minecraft server upon launching the game.
- Custom Server Selection:
- If you run multiple servers, allow players to choose which one to join from the launcher.
- Branding:
- Incorporate your server’s logo, color scheme, and graphics to reinforce your brand identity.
- Interactive Buttons:
- Add buttons for play, settings, updates, and more.
- Keep Players Informed:
- Display news, updates, or maintenance notices directly on the launcher.
- Automatic Updates:
- The launcher can check for and install updates to ensure players have the latest version.
- Integrate Social Media Feeds:
- Display your latest tweets or Discord announcements.
- Embed Videos:
- Showcase promotional videos or tutorials within the launcher.
- User Authentication:
- Require players to log in with their Minecraft credentials for added security.
- Anti-Cheat Integration:
- Incorporate anti-cheat measures to maintain fair play on your server.
- Reach a Global Audience:
- Offer language options to cater to players from different regions.
- Access the Tool:
- Go tothis Minecraft page to learn more and download the software.
- Easy Installation:
- Follow the on-screen instructions to install Game Launcher Creator V3 on your computer.
- Launch the Editor:
- Open Game Launcher Creator V3 and start a new project.
- Customize the Interface:
- Use the drag-and-drop editor to add backgrounds, buttons, text fields, and images.
- Set Up Functionality:
- Configure buttons to launch Minecraft and connect directly to your server.
- Plugins and Extensions:
- Enhance your launcher with additional plugins available within the software.
- Test Your Launcher:
- Use the preview feature to ensure everything works as intended.
- Export the Launcher:
- Compile your project into an executable file.
- Share with Players:
- Provide the launcher download link on your website, Discord server, or social media platforms.
- Guidance for Users:
- Offer installation instructions to help players set up the launcher easily.
- Streamlined Experience:
- Players can join your server with a single click, eliminating the need to enter IP addresses manually.
- Enhanced Engagement:
- Regular updates and embedded content keep players informed and engaged.
- Professional Appeal:
- A custom launcher sets your server apart and showcases your dedication to the community.
- Monetization Opportunities:
- Incorporate donation buttons or links to premium content if you wish to monetize your server (ensure compliance with Minecraft’s EULA).
Conclusion
You’ve embarked on an exciting journey from setting up your own Minecraft server to exploring ways to grow and enhance your community. Here’s a quick recap of what we’ve covered:- Preparing Your Computer: Ensured your system meets the requirements and installed Java.
- Setting Up the Minecraft Server: Downloaded the server files and got your server running.
- Configuring Your Server: Customized settings, set up port forwarding, and tailored your world.
- Connecting to Your Server: Learned how to join your server and invite friends.
- Growing and Enhancing Your Server: Promoted your server and created a custom launcher with Game Launcher Creator V3.


