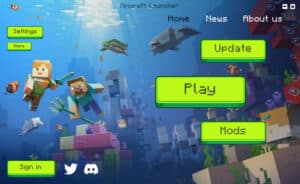
See how ridiculously easy it is to create a custom Minecraft launcher with Game Launcher Creator V3 in this video.
What do we need?
You need Game Launcher Creator V3 (GLCV3) any edition will do, and you need the standard Minecraft plugin.
Once you have both of these installed you simply need to create a new launcher project. You can do this by going to File and selecting New Project in the GLCV3 menu.
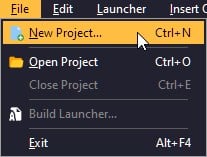
Select a template, fill out all the details and click the Create button.
Creating your own Minecraft Launcher
Once you have a new project created, you need to head over to the object panel on the right and insert a Minecraft object. If this object is not available, you must not have it installed and you will need it installed. Install it and restart GLCV3.
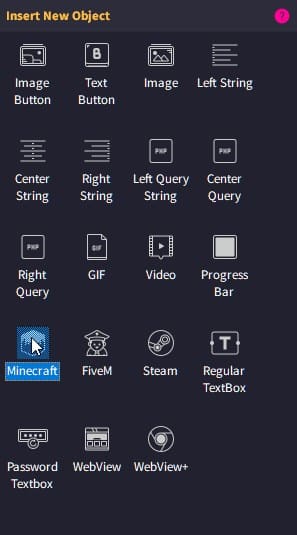
Once you have inserted the Minecraft object, you need to select it inside the editor and click on the settings cog.

Once the settings dialog opens, click on General and then proceed to fill out your Minecraft server details. For example, in the Server IP section type in your server’s IP address (or DNS entry). Then proceed to specify the Server Port, the default is 25565, if you don’t know it.
Then fill out the Server Version string. This should be written exactly as the server specifies. For example, 1.20.1. If you are using Forge or Minecraft, you should write it out exactly how it appears in your server. Once all this is filled out, you can close this dialog.
Insert a Connect Button
You should now select the Minecraft object again and whilst it is selected, look over to the Minecraft Properties box on the right. You will see a text box at the top that is greyed out with the letter I: this is the internal name of the Minecraft object. You should select this text with your mouse, right-click and copy it to your clipboard.
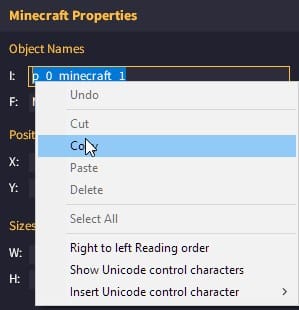
Now insert a button, or select a button in your launcher to use as a connect to Minecraft server button. If you don’t have a button, you can insert a new one using an Image Button or Text Button from the object panel on the right.
When you have selected a button, go to the settings for that button. When the settings dialog appears, click on Action(s) and click the plus (+) sign to add a new action.
When the new action list appears select Minecraft and in the text box that appears, paste in the internal Minecraft object name we copied earlier. It is usually p_0_minecraft_0
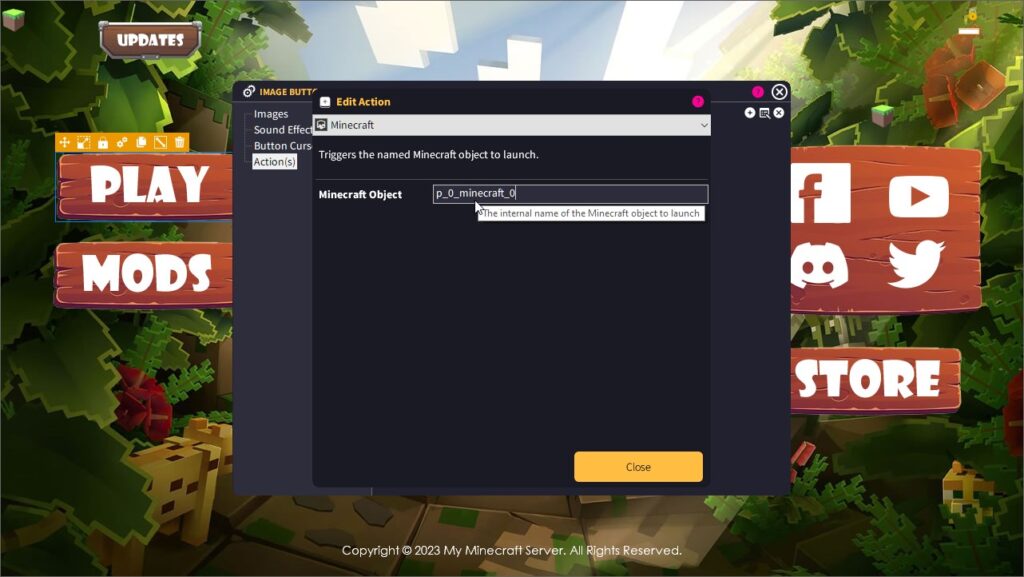
You can now close this dialog.
Finishing Up
That is literally how easy it is to create your own custom Minecraft launcher with Game Launcher Creator V3.
Now when your players run your launcher, they simply click the connect button, login to Minecraft and it will connect them instantly to your server.
There are many other options available in GLCV3 for you to do. For example, you can also create your own update system to keep your mod files up to date on your user’s computer. You can also create links to Tebex stores, message forums, all social media platforms like Facebook, Twitter, TikTok and many more.
We highly recommend you check out the Custom Minecraft Launcher page here on our website for a full lowdown of what is available and a preview of the editor itself and some videos thrown in.
To boot, you can also create custom launchers for many other games including FiveM, Rust, ARMA III etc. There are practically no limits and you can create as many launchers as you want. Game Launcher Creator V3 is definitely the number one tool of choice for creating custom launchers.


