Minecraft, despite being one of the most popular games ever created, is not immune to technical issues. Whether you’re a long-time player or new to the game, running into Minecraft errors can disrupt your gaming experience. The good news is that most common Minecraft errors have simple fixes. In this handy guide we have written, we’ll take a look at some of the most frequent issues Minecraft players face and how you can resolve them quickly to get back to building, crafting, and exploring.

Pre-Troubleshooting Minecraft Checklist
Before tackling specific Minecraft errors, it’s always good to run through a few general steps to ensure your Minecraft setup is healthy and less prone to errors. Many issues can be resolved by addressing basic setup and system configurations. Here are some best practices to follow when trying to resolve Minecraft errors.
1. Keep Minecraft Updated
Many errors occur when you’re running an outdated version of Minecraft. Make sure your game client is up-to-date by checking for updates in the Minecraft launcher. Mojang regularly releases patches to fix bugs and improve performance, so keeping the game updated ensures you have the latest fixes.
2. Ensure Java Is Installed and Updated
Minecraft runs on Java, so any issues related to Java can cause crashes or performance problems. Ensure you have Java 64-bit installed (32-bit can cause memory issues), and keep it updated. You can download or update Java from the official Java website.
To check your Java version:
java -versionOn Windows, open up a command prompt window and type in:
java -version
If Java is outdated, uninstall the old version and install the latest one.
3. Allocate Sufficient RAM
Minecraft can be resource-intensive, especially if you’re running mods or large worlds. Allocating more RAM in the Minecraft launcher can help prevent memory-related crashes:
- Open the Minecraft launcher
- Click on Installations
- Click on the three dots next to your installation and select Edit
- Under More Options, adjust the RAM allocation by increasing the value after
-Xmx(e.g.,-Xmx4Gfor 4GB).
Remember, you shouldn’t allocate more than half of your total RAM to Minecraft, or your system may run out of memory.
4. Backup Your Worlds and Settings
Before making any changes or troubleshooting major issues, always back up your worlds and configuration files. This way, you can restore them if something goes wrong during troubleshooting.
To back up your Minecraft worlds:
- Navigate to the
%APPDATA%\.minecraft\savesfolder on Windows or~/Library/Application Support/minecraft/saveson macOS. - Copy your world folder to a safe location.
5. Ensure Mods Are Compatible
If you’re running mods, one of the most common causes of crashes is mod conflicts or running mods that are incompatible with your version of Minecraft. Double-check that your mods are up to date and compatible with the version you’re running. You can do this by visiting the mod’s page on CurseForge or Modrinth.
6. Use Performance Optimization Mods
If you’re experiencing performance issues, mods like OptiFine (for graphical optimization) or Sodium (for Fabric-based optimization) can help improve FPS and reduce lag, even if you’re running a lot of other mods.
7. Check for Firewall and Antivirus Interference
Sometimes your firewall or antivirus software can block Minecraft from connecting to multiplayer servers, or they may falsely detect Minecraft as a threat. Ensure Minecraft is whitelisted in your firewall and antivirus settings, and check whether disabling them temporarily resolves any connection issues.
8. Ensure a Stable Internet Connection
If you’re having trouble connecting to multiplayer servers, make sure your internet connection is stable. A wired Ethernet connection is preferred over Wi-Fi for a more consistent gaming experience. You can also reset your router or perform a speed test to check your network’s performance.
9. Reset Minecraft Settings
Sometimes tweaking too many settings in Minecraft can cause errors. Resetting your Minecraft settings to default can fix performance issues or strange behavior caused by incompatible settings.
To reset settings:
- Go to the options.txt file located in
%APPDATA%\.minecraft\options.txt. - Delete this file or rename it, and Minecraft will create a new one with default settings the next time you launch the game.
10. Check for System Requirements
Make sure your computer meets or exceeds the minimum system requirements for Minecraft. If your system is below the recommended requirements, it can cause crashes, lag, or slow performance.
Here’s a quick rundown of the minimum system requirements for Minecraft:
- OS: Windows 10 or higher, macOS, Linux
- Processor: Intel Core i3 or AMD equivalent
- RAM: 4GB (minimum)
- Graphics: Integrated GPU or dedicated GPU (such as Nvidia GTX 750 Ti)
- Storage: At least 1GB available space (more for mods)
Laptops are okay for Minecraft, but laptops manufactured before 2016 will probably have a hard time playing Minecraft on any kind of decent settings. We recommend playing Minecraft on a Desktop PC for the best performance and quality.
Specific Minecraft Errors and Fixes
Okay, here’s the juicy stuff. If you are experiencing a particular Minecraft error message when it comes to Minecraft, we got you covered.
Below is a list of the most common Minecraft errors and solutions to try and fix these problems. We have also included a quick Minecraft Batch Script file we wrote further down for you to try out too.
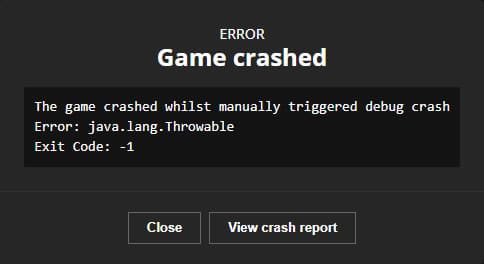
Error 1: “Game Crashes on Startup”
What causes it? One of the most frustrating errors for Minecraft players is when the game crashes right as it launches. This issue is often caused by outdated or incompatible mods, issues with Java installation, or insufficient system memory.
How to fix it:
- Update Java: Minecraft relies on Java to run, so ensuring you’re running the latest version is crucial. Visit the official Java download page and install the latest version.
- Check for Mod Conflicts: If you’re using Minecraft mods, ensure that they are compatible with the version of Minecraft you’re running. Disable or remove mods one by one to identify the culprit. Using a mod manager can help prevent version conflicts.
- Allocate More RAM: If your computer has enough memory, allocating more RAM to Minecraft can prevent crashes. In the Minecraft launcher, go to “Installations,” click on your version, and under “More Options,” increase the allocated memory.
Error 2: “Unable to Connect to World”
What causes it? This is a common multiplayer issue that occurs when players can’t connect to their friends’ Minecraft worlds. It usually stems from network or connection problems on either end.
How to fix it:
- Check Your Internet Connection: Make sure your internet is working and stable. Sometimes resetting your router can solve connection problems.
- Ensure You’re on the Same Version: If you’re playing with friends, ensure everyone is using the same version of Minecraft. You can verify this in the Minecraft launcher.
- Configure Your Firewall/Antivirus: Sometimes, firewalls or antivirus programs block Minecraft’s connection. Temporarily disable them or allow Minecraft through the firewall by adjusting your settings.
- Port Forwarding: For players hosting their own worlds, port forwarding (port 25565 for Minecraft) may be required. Check your router settings to enable this.
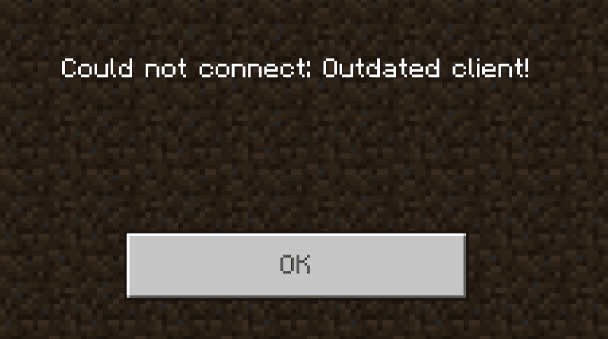
Error 3: “Outdated Client”
What causes it? This error occurs when the server you’re trying to join is running a different version of Minecraft than your client. It typically happens after a new update is released.
How to fix it:
- Update Minecraft: If your client is outdated, open the launcher and allow Minecraft to update to the latest version.
- Downgrade Your Version: If the server hasn’t updated yet, you can change your client version to match the server. In the Minecraft launcher, click “Installations” and create a new installation with the older version.
Error 4: “Minecraft Has Run Out of Memory”
What causes it? This error occurs when Minecraft uses more memory than your system allows. It’s common on older computers or when using large modpacks.
How to fix it:
- Allocate More RAM: As mentioned earlier, you can allocate more RAM to Minecraft by adjusting the launcher settings under “Installations.” Increase the allocated RAM but be cautious not to allocate more than your system can handle.
- Close Unnecessary Programs: Minecraft is resource-heavy, especially when mods are involved. Close other applications running in the background to free up system memory.
- Optimize with Mods: Installing performance-enhancing mods like OptiFine can optimize how Minecraft uses your computer’s resources, reducing memory strain.
Error 5: “Invalid Session: Try Restarting Your Game”
What causes it? This error occurs when Minecraft fails to authenticate your login session, often due to connection issues or because the session has expired.
How to fix it:
- Restart Minecraft: This is often the simplest fix. Close the game completely and restart it to refresh your session.
- Re-log into Your Account: If restarting the game doesn’t work, log out of your Minecraft account and log back in to refresh your authentication.
- Check Mojang Servers: Sometimes this error occurs due to issues on Microsoft’s end. You can check the status of Microsoft’s servers here.
Error 6: “Minecraft Launcher Not Opening”
What causes it? Sometimes, the Minecraft launcher refuses to open or crashes on startup. This can happen due to corrupted files, incompatible software, or other technical issues.
How to fix it:
- Update Graphics Drivers: Ensure your graphics drivers are up to date, as outdated drivers can prevent the launcher from starting.
- Delete Corrupt Files: Corrupted Minecraft files can cause the launcher to fail. Navigate to the “.minecraft” folder and delete the launcher_profiles.json file. When you restart the launcher, it will regenerate the file automatically.
- Reinstall Minecraft: If all else fails, uninstall Minecraft entirely and then reinstall it. Be sure to back up your worlds first.
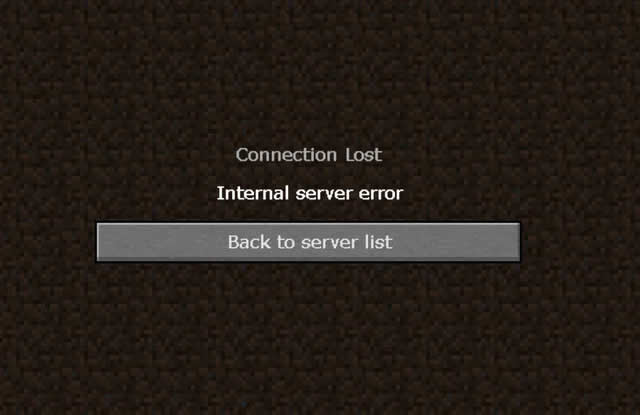
Error 7: “Internal Server Error”
What causes it? This error typically happens on multiplayer servers when there’s a conflict with mods, corrupted files, or issues with server settings.
How to fix it:
- Check Server Logs: Server logs can provide clues as to what went wrong. Look for any errors or conflicts, especially related to mods or plugins.
- Reinstall Plugins/Mods: If the error seems tied to a specific mod or plugin, try reinstalling or updating it to a compatible version.
- Restart the Server: Sometimes, a simple restart can clear up internal conflicts. Ensure that everything restarts properly and check if the error persists.
Error 8: “Outdated Server”
What causes it? When trying to join a server that’s running an older or newer version of Minecraft than your client, you’ll receive this error.
How to fix it:
- Update Your Game: If your game is out of date, update it via the Minecraft launcher. Always make sure you’re using the same version as the server.
- Match the Server Version: If the server hasn’t updated yet, you can adjust your version by going to the Minecraft launcher, clicking “Installations,” and selecting the appropriate Minecraft version.
Error 9: “Failed to Authenticate Your Connection”
What causes it? This error happens when the game can’t authenticate your account properly, often due to server or network issues.
How to fix it:
- Restart Minecraft: A simple restart often fixes authentication errors by refreshing your session.
- Log Out and Back In: Log out of the Minecraft launcher and then log back in to refresh your account’s authentication with the server.
- Check Mojang Servers: Authentication issues can sometimes be related to server problems on Mojang’s end. You can check their status online.
Error 10: “Failed to Load Resource Pack”
What causes it? This error occurs when Minecraft fails to load or apply a resource pack, which could be due to an unsupported format, missing files, or corrupt data.
How to fix it:
- Verify Resource Pack Compatibility: Make sure the resource pack you’re trying to load is compatible with your version of Minecraft.
- Reinstall the Resource Pack: Try re-downloading and reinstalling the resource pack. Ensure that all files are placed correctly in the “resourcepacks” folder.
- Allocate More RAM: Resource packs, especially high-resolution ones, can be RAM-intensive. Allocating more memory to Minecraft can solve the issue.
Error 11: “Can’t Resolve Hostname”
What causes it? This error usually occurs when you’re trying to connect to a server, but Minecraft can’t resolve the IP or domain name due to a typo or DNS issue.
How to fix it:
- Check for Typo: Double-check the server’s IP or hostname to ensure there are no spelling errors or extra spaces.
- Flush Your DNS: Sometimes DNS issues can cause Minecraft to struggle with resolving server addresses. Flushing your DNS cache by running
ipconfig /flushdnsin Command Prompt can help. - Use Direct IP: If the server has a domain name, try using the direct IP address instead.

Error 12: “Skin Not Showing”
What causes it? This error occurs when your Minecraft skin does not load, and instead, the default Steve or Alex skin appears. This is often due to connection issues or skin servers being down.
How to fix it:
- Check Your Internet Connection: Make sure you’re connected to the internet properly, as Minecraft needs to fetch skins from its servers.
- Re-upload Your Skin: If the issue persists, go to Minecraft’s official website and re-upload your custom skin.
- Wait for Mojang Servers: If the skin servers are down, unfortunately, there’s not much you can do except wait for Mojang to resolve the issue.
- Minecraft Settings: In your Profile options, ensure “Only Allow Trusted Skins” is NOT selected. This will allow non-official and non-marketplace skins to be used in Minecraft.
Error 13: “Failed to Synchronize Registry Data from Server”
What causes it? This error occurs when your client’s mod data doesn’t match the server’s registry, typically caused by conflicting or outdated mods.
How to fix it:
- Ensure Mods Are Aligned: Both the server and client need to have the exact same mods and versions installed. Check for mod compatibility between both sides.
- Reinstall Mods: Sometimes, reinstalling mods or refreshing the modpack can fix synchronization issues. Ensure that all files are correctly installed and up to date.
Error 14: “Server Tick Time Out”
What causes it? This error happens when a Minecraft server is under heavy load or lagging, causing the server to crash or stop responding. It’s usually due to performance issues or heavy mod usage.
How to fix it:
- Reduce Server Load: Consider reducing the number of active players, mobs, or redstone contraptions that can be slowing down the server. Removing unnecessary mods can also help.
- Allocate More RAM to Server: If possible, increase the amount of RAM allocated to the server to handle heavier loads better.
- Optimize Server Performance: Installing server performance optimization mods like Spark or Paper can help reduce lag.
Error 15: “Error Code 5: Failed to Create Profile”
What causes it? This error happens when Minecraft’s launcher fails to create a profile, which could be due to file corruption or permission issues.
How to fix it:
- Reinstall the Launcher: If Minecraft’s launcher is corrupted, uninstall and reinstall it to ensure all necessary files are restored.
- Run as Administrator: Right-click the launcher and select “Run as Administrator” to give it proper permissions to create a profile.
Error 16: “LAN Not Working”
What causes it? Sometimes players on the same local network (LAN) cannot join each other’s game due to network or firewall issues.
How to fix it:
- Check Firewall Settings: Ensure that Minecraft is allowed through your firewall. Add exceptions if necessary.
- Verify IP Address and Port: Make sure players are connecting to the correct local IP and port number for the LAN game.
- Disable VPNs: If anyone on the network is using a VPN, it may cause issues with LAN connections. Disable it and try connecting again.
Error 17: “Connection Timed Out”
What causes it? This error occurs when your connection to a Minecraft server fails due to network lag, high latency, or server overload.
How to fix it:
- Restart Router: Restart your router to ensure a stable internet connection.
- Try a Wired Connection: If possible, switch to a wired connection (Ethernet) instead of Wi-Fi, as it provides more stability for gaming.
- Check Server Status: Sometimes, the server itself is experiencing issues. Contact the server admin or check for server updates.
Error 18: “Launcher Error: Play Button Greyed Out”
What causes it? This issue occurs when Minecraft’s launcher fails to properly load the game files, leaving the “Play” button disabled.
How to fix it:
- Restart the Launcher: Close and reopen the Minecraft launcher to see if the button becomes active again.
- Check for Updates: Ensure both the launcher and Minecraft are updated to their latest versions.
- Delete Cached Files: Corrupted cache files may be causing the issue. Navigate to the “.minecraft” folder and delete the launcher_msa.json and launcher_accounts.json files.
Error 19: “OpenGL Error: 1281”
What causes it? This error occurs when there’s a problem with Minecraft’s rendering, often caused by outdated or incompatible graphics drivers.
How to fix it:
- Update Graphics Drivers: Ensure your graphics card drivers are up to date by visiting the manufacturer’s website.
- Disable Shaders or Mods: Sometimes, shaders or certain mods can cause rendering issues. Try disabling them to see if the error resolves.
- Allocate More RAM: If you’re running high-demand graphics mods or shaders, increasing Minecraft’s allocated memory can help avoid this error.
Error 20: “Error Code: -805306369 (Out of Memory)”
What causes it? This error happens when Minecraft runs out of memory, especially when using resource-intensive mods or large modpacks.
How to fix it:
- Increase Allocated RAM: Go to your Minecraft launcher, click “Installations,” and adjust the JVM arguments to allocate more memory to the game.
- Lower Graphics Settings: Reduce render distance, particle effects, and other settings that can put pressure on your system’s memory.
- Use Performance Mods: Installing optimization mods like Sodium or OptiFine can significantly improve memory management and performance.
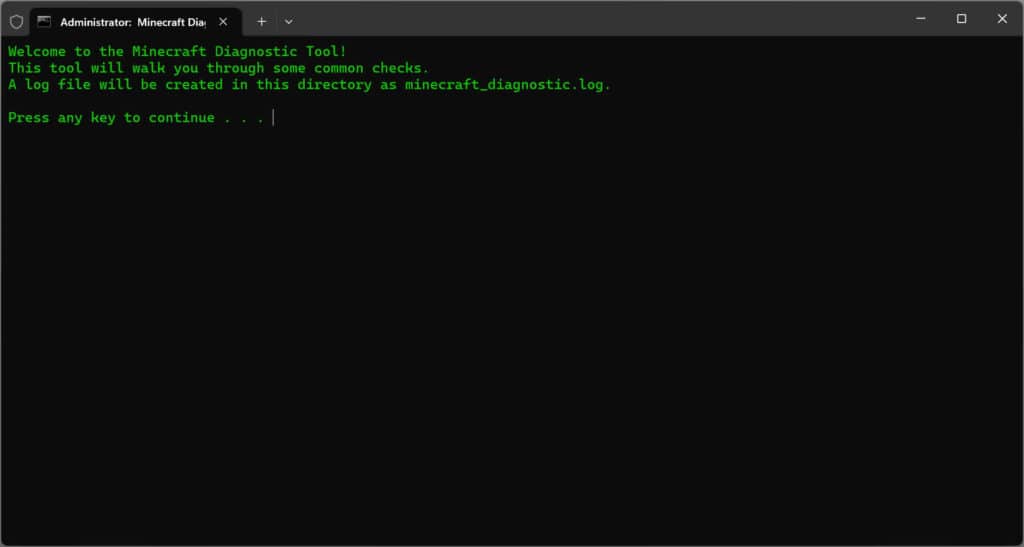
Minecraft Diagnostic Tool
Here at Game Launcher Creator, we have written an awesome tool that you can download and run for free and it will check through the standard checks for you and let you know of any problems it detects.
It comes in the form of a Batch Script. You can copy the text below. Only Windows is supported for this tool.
You should create a new batch file on your desktop (or text file) and rename it to minecrafters.bat and then right-click and edit it. Paste the code in below and then run it.
Features of this batch file:
- Java Version Check: It verifies if Java is installed and logs the version.
- RAM Allocation Check: Reads the
launcher_profiles.jsonfile to find out how much RAM is allocated to Minecraft. - Network Ping Test: Pings
minecraft.netto check if the user’s internet connection is working. - Minecraft Options Check: It looks into the
options.txtfile to extract the render distance setting (useful for troubleshooting performance issues). - Log File: All information is written to a log file (
minecraft_diagnostic.log) for future reference.
After you have run through the steps, it should product a log file in the same folder you run the batch file from. You can view this text file log by opening it in Notepad.
Code:
@echo off
title Minecraft Diagnostic Tool from Game Launcher
color 0A
set LOGFILE=minecraft_diagnostic.log
echo Minecraft Diagnostic Tool > %LOGFILE%
echo. >> %LOGFILE%
echo Date: %date% Time: %time% >> %LOGFILE%
echo ========================================== >> %LOGFILE%

:START
echo Welcome to the Minecraft Diagnostic Tool!
echo This tool will walk you through some common checks.
echo A log file will be created in this directory as minecraft_diagnostic.log.
echo.
pause

:JAVA_CHECK
echo Checking for Java installation...
java -version >nul 2>&1
if %ERRORLEVEL% neq 0 (
    echo Java is NOT installed! >> %LOGFILE%
    echo Java is not installed on your system. Please install it from https://www.java.com
    goto NEXT_CHECK
) else (
    echo Java is installed! >> %LOGFILE%
    java -version >> %LOGFILE%
    echo Java is installed and functioning.
    echo.
    echo Java details logged in minecraft_diagnostic.log
    echo.
)
pause

:NEXT_CHECK
echo.
echo Checking RAM allocation in Minecraft...
for /f "tokens=2 delims==" %%a in ('findstr /i "Xmx" %APPDATA%\.minecraft\launcher_profiles.json') do set "allocated_ram=%%a"
if "%allocated_ram%"=="" (
    echo Could not find allocated RAM setting. >> %LOGFILE%
    echo RAM allocation not found. Make sure it's configured in the launcher.
    goto PING_CHECK
) else (
    echo Allocated RAM: %allocated_ram% >> %LOGFILE%
    echo Allocated RAM: %allocated_ram%
    echo.
)
pause

:PING_CHECK
echo.
echo Testing network connectivity to Minecraft server...
ping minecraft.net -n 4 > nul
if %ERRORLEVEL% neq 0 (
    echo Unable to reach Minecraft server. >> %LOGFILE%
    echo Connection to minecraft.net failed. Check your internet connection.
) else (
    echo Successfully connected to minecraft.net >> %LOGFILE%
    echo Connection to Minecraft server is good.
    echo.
)
pause

:OPTIONS_CHECK
echo.
echo Checking Minecraft options...
if exist "%APPDATA%\.minecraft\options.txt" (
    findstr /c:"renderDistance" "%APPDATA%\.minecraft\options.txt" >> %LOGFILE%
    echo Render Distance setting logged in minecraft_diagnostic.log
) else (
    echo Could not find options.txt >> %LOGFILE%
    echo Minecraft options file not found. Make sure Minecraft has been run at least once.
    echo.
)
pause

:COMPLETE
echo.
echo Diagnostics complete! You can review the detailed log in minecraft_diagnostic.log.
echo Thank you for using the Minecraft Diagnostic Tool from GameLauncherCreator.com
echo
pause
exit
This is not a fully comprehensive troubleshooting tool, however it will check a few basic things and let you know the results.
Check out our other articles below for more help and information on Minecraft, Minecraft servers and Minecraft Launchers.